2020. 11. 19. 15:19ㆍFlutter
섹션 10:Quizzler [List, Class, Object]
List
지난 시간의 실로폰에 이어서 이번에는 퀴즈를 맞추는 앱을 개발하겠습니다. 우선 대부분의 언어에 다 있는 배열에 대해 알아 봅시다.
배열이란?
특정한 타입의 데이터를 연속으로 여러개 가질 수 있는 자료형을 뜻한다. 그럼 Dart에서 어떻게 사용하는지 알아 봅시다.
void main() {
  List hi = ['Angela', 'James', 'Katie', 'Jack']; //dynamic
  List<String> name = ['Angela', 'James', 'Katie', 'Jack']; //String type

  print(hi[0]); // Angela
  print(hi.indexOf('James')); // 1
  hi.insert(2, "Ben"); // [Angela, James, Ben, Katie, Jack]
  hi.add("Ben"); // [Angela, James, Katie, Jack, Ben]
  print(hi.first);
  print(hi.last);
}
배열의 데이터에 접근하려면[index]
몇번째 index의 값이 되는지 선택할 수 있다.
indexOf(value)
해당 배열에 입력한 값이 몇번째 인덱스에 위치하는지 반환한다.
add(value)
value가 가장 뒤에 입력시켜준다.
insert(index, value);
index에 value를 넣을 수 있다. 뒤에 있는 값들은 뒤로 한칸씩 밀려난다.
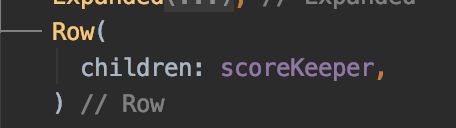
flutter에서는 위의 사진과 같이 바로 배열을 대입할 수 있다.
조건문
조건문의 경우에는 다른 언어와 비교해서 특별하게 다른 점이 없었다. 우리가 이전에 알던 !, &&, ||는 물론이고 if, if else, else 등의 키워드도 그대로 사용할 수 있었다.
if(condition){

}else if(condition){

}else{

}
또는 아래와 같은 키워드를 가미시켜서 사용할 수도 있었다.
| 표현 | 의미 |
| ! | not |
| && | and |
| || | or |
Class와 Object
Class란 객체에 대한 설계도를 갖고 있다고 생각하면 된다. 예를 들어서 자동차라는 클래스를 생각보면 아래와 같이 특성에는 색, 좌석의 수 기능에는 운전과 브레이크가 있다.

코드 사용방법
Class Car{ // 클래스 이름은 대문자로 시작
    int numberOfSeats = 5;
    String color = "blue"; // properties

    void drive(){} // method
    void break(){}
}
Object란 위와 같은 설계도를 바탕으로 실제로 만들어진 자동차를 의미한다.
Car 🚗 = Car();
🚗.color; // blue
🚗.numOfSeats; // 5
생성자
생성자는 간단하게 객체의 생성과 함께 동시에 실행되는 함수라고 생각하면 편하다.
Class Car{
  String color;
  int numOfSeats;

  Car({String c, int n}){
  	color = c;
    numOfSeats = n;
  }

  void drive(){}
  void break(){}
}

Car 🚗 = Car({c:"red", n: 5});
🚗.color; // red
🚗.numOfSeats; // 5
또한 다른 언어와 비슷하게 this를 사용할 수 있다.
Class Car{
  String color;
  int numOfSeats;

  Car({String color, int numOfSeats}){
  	this.color = color;
    this.numOfSeats = numOfSeats;
  }

  void drive(){}
  void break(){}
}

Car 🚗 = Car({color:"red", numOfSeats: 5});
🚗.color; // red
🚗.numOfSeats; // 5
또한 kotlin과 비슷하게 {}없이 바로 데이터를 할당할 수 도 있다.
Class Car{
  String color;
  int numOfSeats;

  Car({this.color, this.numOfSeats});

  void drive(){}
  void break(){}
}

Car 🚗 = Car({color:"red", numOfSeats: 5});
🚗.color; // red
🚗.numOfSeats; // 5
추상화
추상화란 공통의 기능이나 특성을 묶어 버리는 것을 의미한다. 예를 들어서 토끼, 강아지, 고양이 등은 동물이라는 클래스로 공통적으로 묶어버릴 수 있는 것이다. 즉 동물의 경우에는 공통적으로 갖고 있는 살아있음, 종, 이름 등이 있을 것이다. 하지만 이러한 큰 분류들은 세세하게 들어갈 수록 오버라이딩을 통해 입맛에 맞게 변형하거나 각각의 상황에 맞게 추가 및 변형을 통해 바꿔주면 된다.
강의에서는 퀴즈와 관련된 함수나 파라미터들을 QuizBrain이라는 클래스로 만들어주었다. 아래 코드와 같이 파라미터로는 _questionBank, getQuestionText(), getQuestionAnswer() 등을 만들어주었다.
import 'question.dart';

class QuizBrain {
  int _questionNumber = 0;

  List<Question> _questionBank = [
   ...
  ];

  void nextQuestion() {
    if (_questionBank.length > _questionNumber - 1) {
      _questionNumber += 1;
    }
  }

  String getQuestionText() {
    return _questionBank[_questionNumber].questionText;
  }

  bool getQuestionAnswer() {
    return _questionBank[_questionNumber].questionAnswer;
  }
}
캡슐화
캡슐화란 파라미터와 메소드를 하나의 클래스에 결합시키는 것을 의미한다. 또한 데이터를 private를 통해서 은닉을 통해 외부에서 접근하지 못하게 막는 것이 중요하다. 사람은 누구나 실수를 할 수 있고 객체이름.파라미터 로 접근하는 방법은 너무나 큰 위험성을 갖고 있다. OOP에서는 내가 갖고있는걸 외부에서 알 필요가 없다면 단순히 숨기는 것이 중요하다.
//dart에서는 함수나 property 앞에 _을 붙여서 private로 바꿀 수 있다.
상속
상속이란 부모의 특징 및 메소드 들을 그대로 이어 받을 상황일 때 사용한다. 부모의 정보를 물러 받아 다시 구현할 필요없이 재사용성을 늘린 것을 생각하면 됩니다.

class Car{
  String color;
  int numOfSeats;

  Car({String c, int n}){
  	color = c;
    numOfSeats = n;
  }

  void drive(){
    print("running");
  }
  void stop(){}
}

class ElectricCar extends Car{
  int batteryLevel = 100;

  void recharge(){
    batteryLevel = 100;
  }
}


void main(){
  ElectricCar tesla = ElectricCar();
  tesla.drive();
  tesla.recharge();
}
다형성
상속이란 부모 클래스에서 갖고있는 함수를 자식 클래스에서 오버라이딩 해주어서 각자의 맛에 맞게 바꿀 수 있는 기능이다.
class Car{
  String color;
  int numOfSeats;

  Car({String c, int n}){
  	color = c;
    numOfSeats = n;
  }

  void drive(){
    print("running");
  }
  void stop(){}
}

class SelfDrivingCar extends Car{
  String destination;
  SelfDrivingCar({String desti}){
    destination = desti;
  }

  @override
  void drive(){
    print("don't use hand");
  }
}


void main(){
  SelfDrivingCar sdCar = SelfDrivingCar(desti:"Gumi");
  sdCar.drive(); //don't use hand
}
위와 같은 코드를 통해 부모 클래스의 drive가 아닌 SelfDrivingCar의 drive가 출력되는 것을 알 수 있다. 이를 override라고 한다. 또한 super라는 키워드를 통해 부모의 drive를 출력해줄 수 있다.
class SelfDrivingCar extends Car{
  String destination;
  SelfDrivingCar({String desti}){
    destination = desti;
  }

  @override
  void drive(){
    super.drive();
    print("don't use hand");
  }
}
8번째 줄을 보면 super라는 키워드를 통해서 부모의 함수를 불러올 수 있다.
'Flutter' 카테고리의 다른 글
| [flash chat] static 구문 (0) | 2021.01.25 |
|---|---|
| [Dart] 비동기 프로그래밍 (0) | 2021.01.21 |
| Hot reload Hot Restart (0) | 2020.11.12 |
| Flutter 설치2 - android studio(mac) (0) | 2020.10.03 |
| Flutter는 무엇이고 어떤 장점이 있을까? (0) | 2020.10.03 |