[opencv-python] 색공간 바꾸기 및 색 추적
2019. 7. 4. 00:25ㆍPython-이론/python-opencv
이번에는 프레임에서 특정 색깔만 추출해보겠습니다.
색공간 변경하기!
HSV방법으로 색공간을 변경해보겠습니다. Hue(색상), Saturation(채도), Value(진하기)로 표현할 수 있습니다. saturation은 원의 중심에서 0%에서 100%까지 의미합니다. V는 바닥에서 천장까지 0% ~ 100%를 의미합니다.
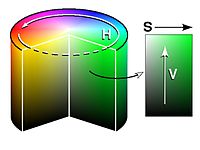
openCV에서는 Hue의 범위를 [0, 179]까지 saturation, Value의 범위를 [0, 255]로 정의하고 있습니다.
아래는 bgr값을 hsv값으로 변경하는 코드입니다.
import numpy as np
import cv2


def hsv():
    blue = np.uint8([[[255, 0, 0]]])
    green = np.uint8([[[0, 255, 0]]])
    red = np.uint8([[[0, 0, 255]]])

    hsv_blue = cv2.cvtColor(blue, cv2.COLOR_BGR2HSV)
    hsv_green = cv2.cvtColor(green, cv2.COLOR_BGR2HSV)
    hsv_red = cv2.cvtColor(red, cv2.COLOR_BGR2HSV)

    print('HSV for BLUE', hsv_blue)
    print('HSV for RED', hsv_red)
    print('HSV for GREEN', hsv_green)


hsv()
cv2.cvtColor(blue, COLOR_BGR2HSV)
위의 코드를 통해 색을 HSV로 변경할 수 있습니다. RGB2HSV도 있고 BGR2HSV가 있어서 잘 구분하여 사용할 수 있어야합니다.
결과
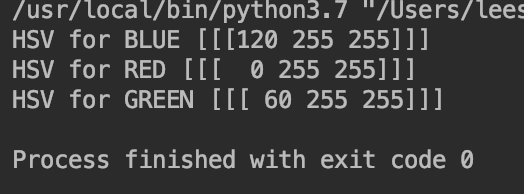
이 말은 파란색이 120의 H에서 채도, 진하기 등을 의미합니다.
이 값의 범위를 이용하여 색을 추적해봅시다.
코드
import numpy as np
import cv2
def tracking():
cap = cv2.VideoCapture(0)
lower_blue = np.array([110, 100, 100])
upper_blue = np.array([130, 255, 255])
lower_green = np.array([50, 100, 100])
upper_green = np.array([70, 255, 255])
lower_red = np.array([-10, 100, 100])
upper_red = np.array([10, 255, 255])
while True:
ret, frame = cap.read()
hsv = cv2.cvtColor(frame, cv2.COLOR_BGR2HSV)
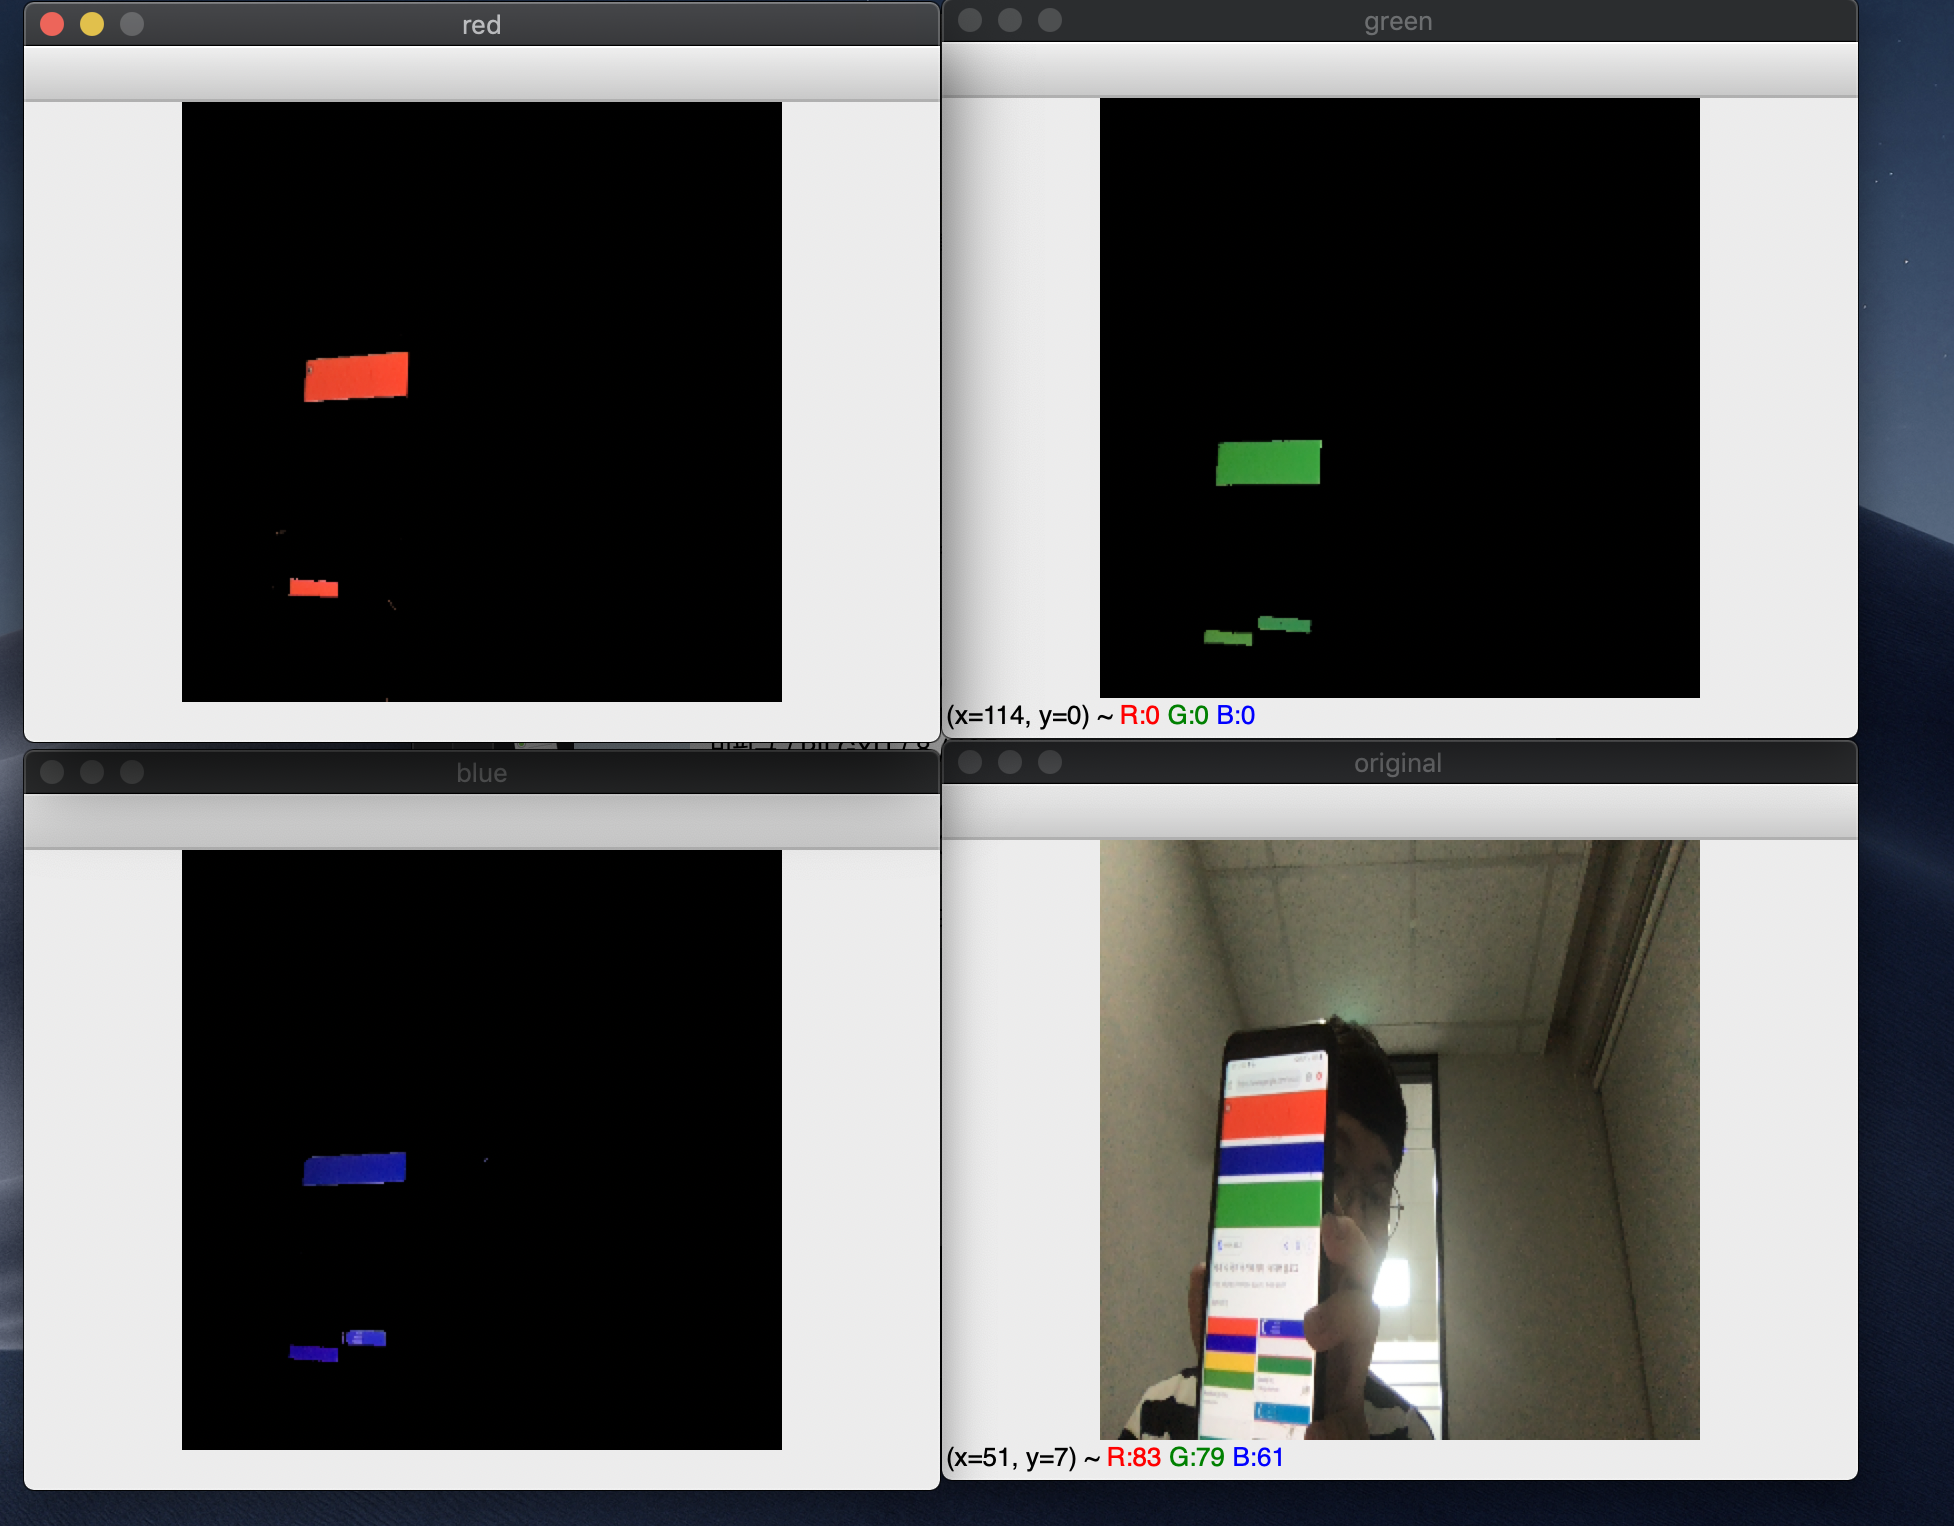
blue_range = cv2.inRange(hsv, lower_blue, upper_blue)
green_range = cv2.inRange(hsv, lower_green, upper_green)
red_range = cv2.inRange(hsv, lower_red, upper_red)
blue_result = cv2.bitwise_and(frame, frame, mask=blue_range)
red_result = cv2.bitwise_and(frame, frame, mask=red_range)
green_result = cv2.bitwise_and(frame, frame, mask=green_range)
blue_result = cv2.resize(blue_result, (300, 300))
green_result = cv2.resize(green_result, (300, 300))
red_result = cv2.resize(red_result, (300, 300))
frame = cv2.resize(frame, (300, 300))
cv2.imshow("original", frame)
cv2.imshow("blue", blue_result)
cv2.imshow("red", red_result)
cv2.imshow("green", green_result)
key = cv2.waitKey(1) & 0xFF
if key == 27:
break
cv2.destroyAllWindows()
tracking()
코드설명
np.array를 통해 hsv를 표현해줄 범위를 만들어줍니다.
inrange
해당 범위에 속하면 값을 그대로 두고 나머지 부분은 0으로 채워서 결과값을 반환합니다. 이러한 방법으로 반복문이 돌 때마다 mask를 만들어줍니다.
bitwise_and를 통해서 (frame, frame) and연산을 해주고 0이면 mask를 씌워줍니다.
결과
'Python-이론 > python-opencv' 카테고리의 다른 글
| [opencv-python] 이미지 변화주기 (0) | 2019.07.06 |
|---|---|
| [opencv-python] 이미지 Thresholding (2) | 2019.07.05 |
| [opencv-python] 이미지 연산 처리를 이용한 합성 (0) | 2019.07.02 |
| [opencv-python] roi 및 속성, 채널 (0) | 2019.07.02 |
| [opencv-python] 트랙바 만들기 (2) | 2019.07.02 |