2020. 1. 11. 06:21ㆍwebpack
webpack loader
webpack은 원래 js만을 bundling할 수 있습니다. 그렇지만 우리는 web 코드를 작성할 때 js뿐만 아니라 css, scss, html, typescript 등등 도 bundling할 수 있어야한다. 그래서 lodaer라는 것을 사용해야한다. 사용법은 entry, ouput과 특별히 다르지 않고 webpack.config.js에
아래 사진과 같이 모듈을 추가해주면 된다. 추가로 필요한 loader는 yarn이난 npm으로 설치해주어야한다.
module: {
    rules: [
      { test: /\.css$/, use: ["style-loader", "css-loader", "sass-loader"] },
      { test: /\.ts$/, use: ["ts-loader"] },
      { test: /backbone/, use:['expose-loader?Backbone', 'imports-loader?_=underscore,jquery']}
    ]
  }
위에서 test는 정규식으로 css, ts파일을 분별합니다. 그리고 해당 파일에 맞는 loader를 use에 작성해줍니다. css-loader는 css파일을 읽는다. style-loader는 css파일을 읽어서 style태그로 변환하여 header에 넣어줍니다.
expose-loader
글로벌 객체를 모듈로 더하는 역할이다.
import-loader
import-loader는 글로벌로 사용할 수 있는 라이브러리들을 설정합니다.
추가로 babel도 loader로 설정할 수 있다.
module:{
	rules:[
    {
    	test: /\.js$/,
        use: [
          {
            loader: "babel-loader",
            options: {
              presets: [["es2015", "react", { modules: false }]]
            }
          }
        ]}
      ]
    }
실습
1. 초기 프로젝트 설정
yarn init
yarn add --dev extract-text-webpack-plugin@next style-loader css-loader
2. index.html, base.css, index.js 작성
index.html
 <!DOCTYPE html>
   <html>
   <head>
    <meta charset="utf-8" />
    <title>CSS & Libraries Code Splitting</title>
   </head>
   <body>
    <header>
      <h3>CSS Code Splitting</h3>
    </header>
    <div>
      <p>
        This text should be colored with blue after injecting CSS bundle
      </p>
    </div>
    <script src="dist/bundle.js"></script>
   </body>
   </html>
base.css
p {
   color: blue;
   }
app/index.js
import "../base.css";특별히 코드상에 어려운 부분이 없다. 실행된 내용은 p태그를 파란색으로 바꾸어준다.
3. webpack.config.js
const path = require("path");

   module.exports = {
   entry: "./app/index.js",
   output: {
       filename: "bundle.js",
       path: path.resolve(__dirname, "dist")
   },
   module: {
       rules: [
       {
           test: /\.css$/,
           use: ["style-loader", "css-loader"]
       }
       ]
   }
   };
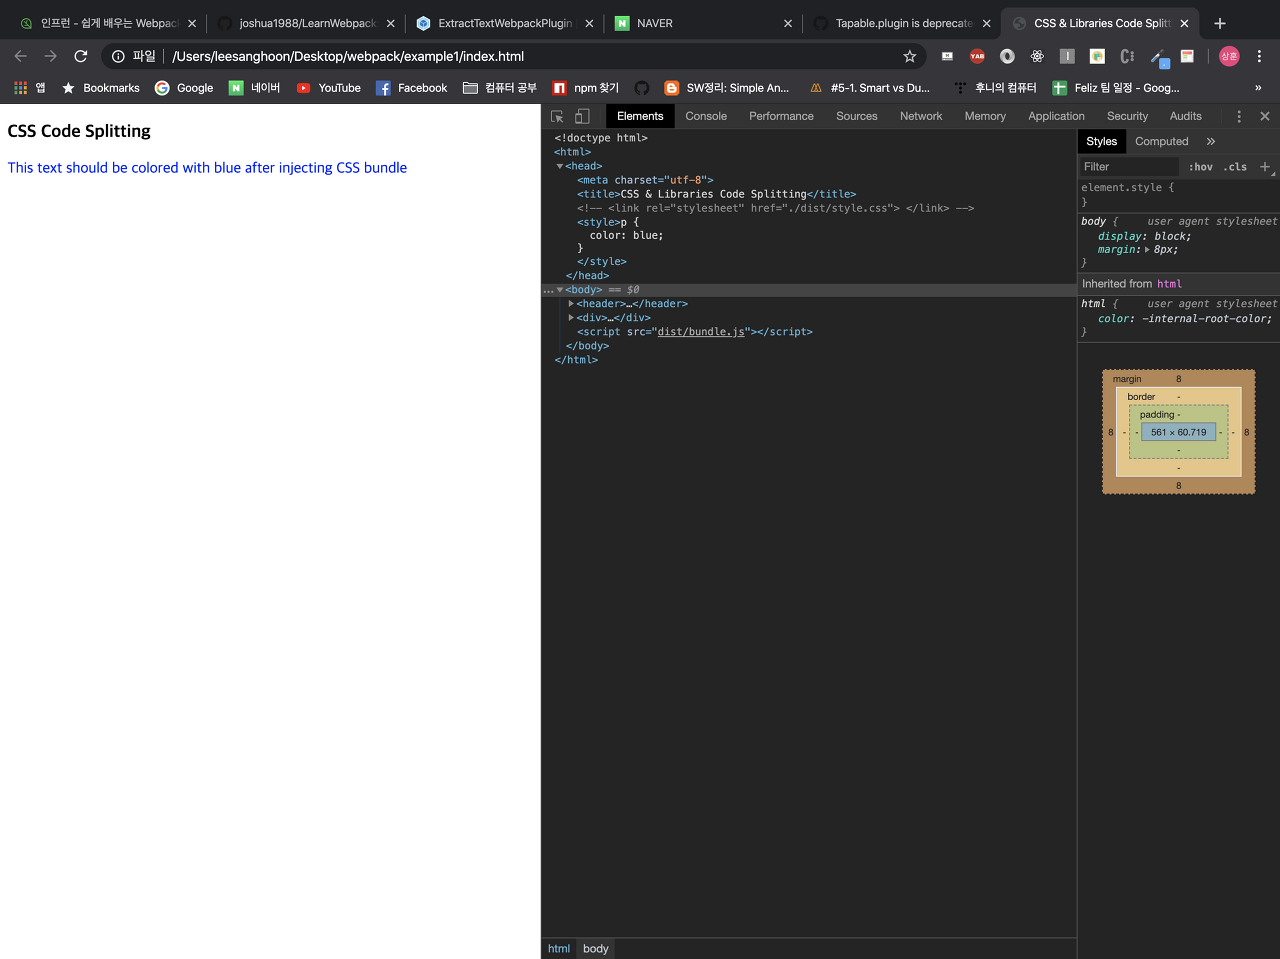
base.css를 bundle화 시키는 코드를 작성하겠습니다. 이상태에서 terminal에 webpack이라고 명령어를 치면 bundle.js가 생기며 아래와 같은 결과가 나온다.

옆의 개발자 도구를 보면 head에 style태그 전체가 박혀있는 것을 알 수 있다. 하지만 모든 css 내용을 head에 전부 넣어버리는 것은 안좋은 행동이다.
코드가 한곳에 모두 존재하면 가독성이 떨어질 뿐더러 유지 보수 또한 안좋아지기 때문입니다. 그래서 head에 모든 css가 들어가는 것을 방지하기 위해 아직 배우지 않은 plugin이라는 기능을 사용해보겠습니다. 1에서 설치한 ExtractTextPlugin을 사용합니다.
https://github.com/webpack-contrib/extract-text-webpack-plugin
webpack-contrib/extract-text-webpack-plugin
[DEPRECATED] Please use https://github.com/webpack-contrib/mini-css-extract-plugin Extracts text from a bundle into a separate file - webpack-contrib/extract-text-webpack-plugin
github.com
	const path = require("path");
    const ExtractTextPlugin = require("ExtractTextPlugin");

    module.exports = {
    entry: "./app/index.js",
    output: {
    filename: "bundle.js",
    path: path.resolve(__dirname, "dist")
   },
    module: {
    rules: [
      {
        test: /\.css$/,
        use: ExtractTextPlugin.extract({
          fallback: "style-loader",
          use: "css-loader"
        })
        //["style-loader", "css-loader"]
      }
    ]
   },
   plugins: [new ExtractTextPlugin("style.css")]
   };
아래 코드와 같이 작성 후 plugins를 통해 css를 번들링했습니다. rules에는 ExtractTextPlugin의 extract()함수를 사용합니다.
extract()
기존의 로더로 새로운 추출로더를 만듭니다.
use (required!)
외부 모듈이 변형되어야 할 때 사용합니다.
fallback
css가 추출되지 않을 때 사용해야하는 로더
그러고 나서 webpack 명령어를 사용하면 dist폴더안에 style.css가 생성된 것을 확인할 수 있습니다.
추가로 html head에 만들어진 style.css를 불러와야하기 때문에 link태그 한줄을 추가합니다.
<link rel="stylesheet" href="./dist/style.css"> </link>그럼 이전과 같이 p태그의 글이 파란색으로 변한것으로 확인할 수 있습니다.
'webpack' 카테고리의 다른 글
| webpack resolve (0) | 2020.01.11 |
|---|---|
| webpack plugin (0) | 2020.01.11 |
| webpack entry와 ouput (0) | 2020.01.11 |
| webpack 시작하기 (0) | 2020.01.07 |
| webpack이란? (0) | 2020.01.07 |