2020. 1. 11. 07:09ㆍwebpack
webpack plugin
plugin을 bundling되기 전이나 후에 파일을 custom하여 개발자가 원하는 추가 기능을 넣을 수 있다.
그래서 어떤 plugin이 있나 알아보자!! 이 글에서는 모든 plugin을 알아보기에는 제한이 있어서 일부만 소개해드리겠습니다.
1. ProvidePlugins
모든 모듈에서 사용할 수 있도록 해당 모듈을 변수로 변환한다. 한마디로 특정 모듈을 전역으로 사용할 수 있게 만든다는 의미입니다. 아래 예제는 jquery를 $라는 변수로 전역으로 사용할 수 있게 만든다는 의미입니다.
new webpack.ProvidePlugin({
$:"jquery"
})
2. DefinePlugins
webpack 번들링을 시작하는 시점에서 필요한 상수들을 정의한다. 문자열 숫자 true/false까지된다.
new webpack.DefinePlugin({
  PRODUCTION: JSON.stringfy(true),
  VERSION: JSON.stringfy(1.3),
})
3. ManifestPlugin
번들링시 생성되는 코드에 대한 정보를 json 파일로 저장하여 관리
new ManifestPlugin({
     fileName:'manifest.json',
     basePath:'./dist/'
   })
예제
1. 필요한 설정 파일 설치
yarn init
yarn add -dev webpack
yarn add lodash moment
yarn add --dev webpack-manifest-plugin
2. index.html, index.js, webpack.config.js등 작성
index.html
<!DOCTYPE html>
<html>
  <head>
    <meta charset="utf-8" />
    <title>Libraries Code Splitting</title>
  </head>
  <body>
    <header>
      <h3>Libraries Code Splitting</h3>
    </header>
    <div>
      <label for="p1"><strong>Moment JS : </strong></label>
      <p class="p1">
        not yet loaded
      </p>
      <label for="p2"><strong>Lodash JS : </strong></label>
      <p class="p2">
        not yet loaded
      </p>
    </div>
    <script src="dist/vendor.js"></script>
    <script src="dist/main.js"></script>
  </body>
</html>
vendor.js와 main.js를 사용하여 <label>안에 코드 작성한다.
index.js
const moment = require("moment");
const _ = require("lodash");
const ele = document.querySelectorAll("p");

document.addEventListener("DOMContentLoaded", function(event) {
  ele[0].innerText = moment().format();
  ele[1].innerText = _.drop([1, 2, 3], 0);
});
첫 p태그와 두번째 p태그에 현재 순간과 배열 모양그대로 [1, 2, 3] 집어넣는다.
webpack.config.js
const webpack = require("webpack");
const path = require("path");

module.exports = {
  entry: {
    main: "./app/index.js",
    vendor: ["moment", "lodash"]
  },
  output: {
    filename: "[name].js",
    path: path.resolve(__dirname, "dist")
  }
};
이전과 다르게 entry를 객체 모양으로 만들었다. main과 vendor로 키값을 나눈다음 output해줄 때 [name].js로 설정해서 bundling 한 파일이 moment.js, lodash.js로 추출되게 만들었다.
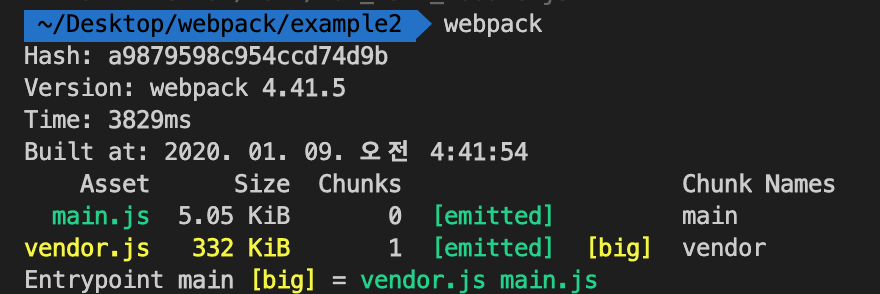
terminal에 webpack 명령어를 실행한다. 그 결과 아래와 같이 dist안에 두개의 bundling된 파일이 생성됩니다.

실행 결과
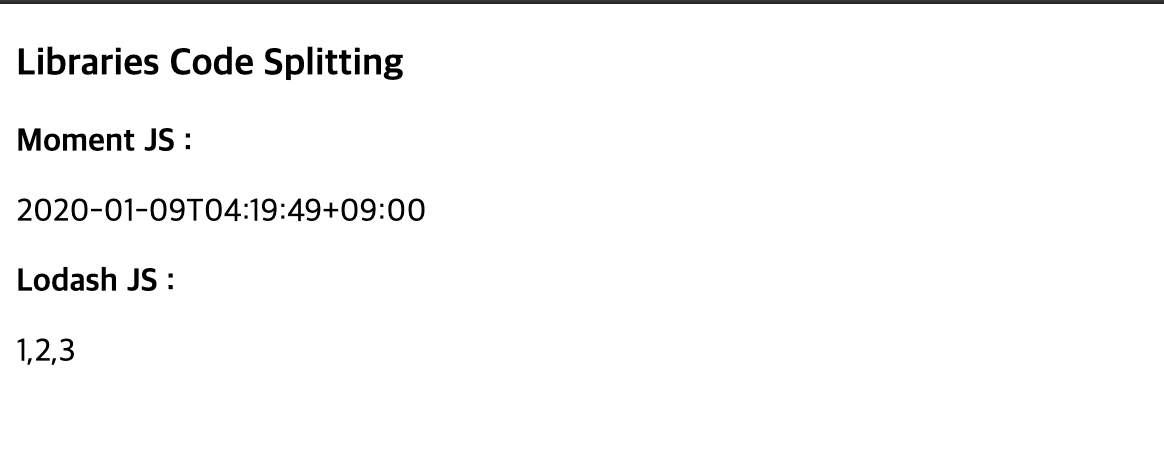
그렇지만 이전과 달리 문제점이 있습니다. index.js에도 require로 jquery 밑 lodash를 불러오고 webpack.config.js에서 moment와 lodash를 bundling해주어서 코드가 겹치는 부분이 생겼다는 것입니다. main.js를 확인하면 아래와 같은 부분을 찾을 수 있습니다.
/**
 * @license
 * Lodash <https://lodash.com/>
 * Copyright OpenJS Foundation and other contributors <https://openjsf.org/>
 * Released under MIT license <https://lodash.com/license>
 * Based on Underscore.js 1.8.3 <http://underscorejs.org/LICENSE>
 * Copyright Jeremy Ashkenas, DocumentCloud and Investigative Reporters & Editors
 **/
webpack.config.js에 아래의 내용을 추가해주면 해결할 수 있다.
optimization: {
    splitChunks: {
      cacheGroups: {
        commons: {
          test: /[\\/]node_modules[\\/]/,
          name: "vendor",
          chunks: "all"
        }
      }
    }
  },
name은 vendor를 기준으로 다른 파일들의 내용을 삭제한다. 따라서 위의 옵션을 추가한 뒤 webpack을 작성하면 main.js의 용량이 줄어든 것을 확인할 수 있다.
Manifest plugin
plugins: [
    new MainfestPlugin({
      filename: "manifest.json",
      basePath: "./dist/"
    })
  ]
아래의 코드를 작성한 후 webpack명령어를 실행하면
결과
{
  "./dist/main.js": "main.js",
  "./dist/vendor.js": "vendor.js"
}
'webpack' 카테고리의 다른 글
| webpack - devServer (0) | 2020.01.14 |
|---|---|
| webpack resolve (0) | 2020.01.11 |
| webpack loader (0) | 2020.01.11 |
| webpack entry와 ouput (0) | 2020.01.11 |
| webpack 시작하기 (0) | 2020.01.07 |